http://saulmm.github.io/avoding-android-cold-starts
내용이 좋아서 스크랩ㅎ
During the last weeks, has been seen in the Android developer community some movement regarding the cold starts, splash screens or launch screens on Android. In this post, I'd like to make clear my opinion of whether they are necessary or not, how to use them and how to go beyond in order to offer the best user experience ofonboarding to our users.
The code and the examples shown in this article are available at this Github repository
Splash screens, launch screens & cold starts.
With this post, Colt McAnlis, (developer advocate at Google) again opened the discussion regarding the usage of Splash/Launch screens on Android sharing akeynote by Cyril Mottier which, among other things, talks about why we should avoid using Splash Screens on Android, arguing that they hurt the user experience, increase the size of the application, etc.
In my opinion, users should have the content available as soon as possible, but inevitably, when a user launches an application, Android creates a new process that, during it charge, shows a black/white screen which is built with the application theme, or the theme of the activity that is the entry point.
This load can be increased if our application is complex and overwrites the application object, which is normally used to initialize the analytics, error reporters, etc.
 Airbnb shows a white screen in its initialization
Therefore, a black screen is not the best choice for our user. If our application load time is slow, we could use a placeholder to simply fill it by real content, or on the other hand, if our workload is complex, we could show the logo of our application to reinforce the branding.
 AliExpress shows its logo in its initialization
Your new friend, windowBackground
As we talked about before, the window displayed by the window manager when the process is in the loading state is set up with the application theme. Specifically with the value inside android:windowBackground. As concerns this post by Ian Lake, if we play with this attribute setting a <layer-list> with the color of the background of the main activity over a small bitmap in the center we can achieve the following effect:

<?xml version="1.0" encoding="utf-8"?>
<layer-list
    xmlns:android="http://schemas.android.com/apk/res/android"
    android:opacity="opaque">

    <item android:drawable="@color/grey"/>
    <item>
        <bitmap
            android:gravity="center"
            android:src="@drawable/img_pizza"/>
    </item>
</layer-list>
We must keep in mind that to avoid problems, the <layer-list> has to be opaque, android:opacity="opaque". And the background of the parent of your activity should be filled with a color in your layout, if not, the <layer-list>shown at the start will remain in your activity.
<?xml version="1.0" encoding="utf-8"?>
<LinearLayout
    xmlns:android="http://schemas.android.com/apk/res/android"
    android:layout_width="match_parent"
    android:layout_height="match_parent"
    android:orientation="vertical"
    android:background="@color/grey"
    >

    <android.support.v7.widget.Toolbar
        android:layout_width="match_parent"
        android:layout_height="?attr/actionBarSize"
        android:background="?colorPrimary"
        android:elevation="4dp"
        />
</LinearLayout>
Styling the onboarding of your app
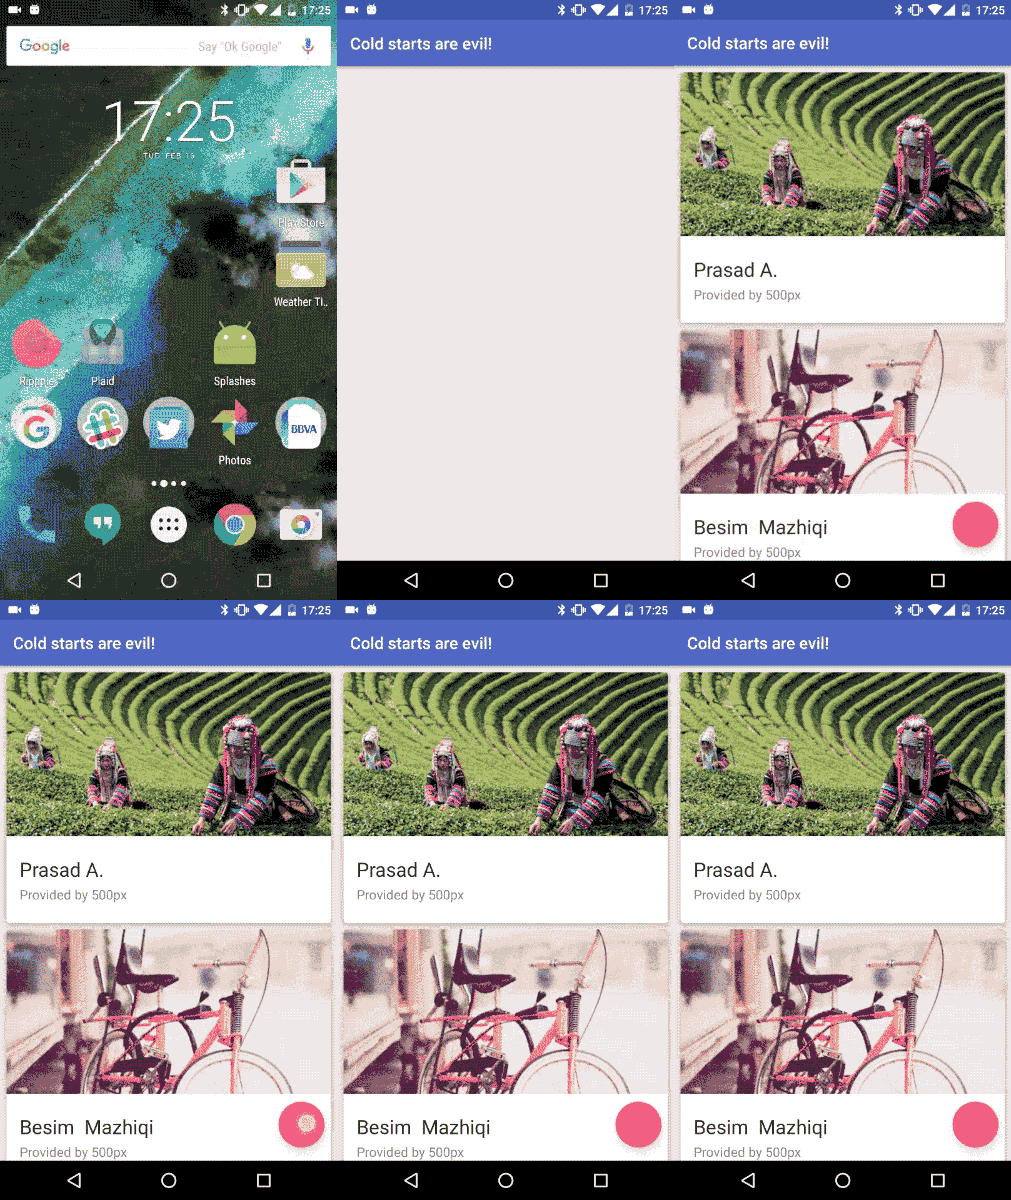
Taking advantage of the windowBackground we can enrich the experience of our users. If our application is complex, and will show a unique activity like a login or a choice selector, we could take the same anchor point of the bitmap and animate it to achieve a nice effect.
For example: 
This animation, translates an ImageView that contains the same resource of the<layer-list>.
ViewCompat.animate(logoImageView)
    .translationY(-250)
    .setStartDelay(STARTUP_DELAY)
    .setDuration(ANIM_ITEM_DURATION).setInterpolator(
         new DecelerateInterpolator(1.2f)).start();
This ImageView is slightly above of the center of the screen, this could be influenced by system bars, I've put a margin top of 12dp which just coincides with the half of the height of the status bar.
<ImageView
    android:id="@+id/img_logo"
    android:layout_width="wrap_content"
    android:layout_height="wrap_content"
    android:layout_gravity="center"
    android:layout_marginTop="12dp"
    android:src="@drawable/img_face"
    tools:visibility="gone"
    />
Styling with a placeholder
With the <layer-list> we can also create a placeholder of theu ui which will take the real content of the main activity, for example, we could emulate a Toolbar by playing with the <layer-list>.

<?xml version="1.0" encoding="utf-8"?>
<layer-list
    xmlns:android="http://schemas.android.com/apk/res/android"
    android:opacity="opaque"
    >
    <item>
        <shape>
            <solid android:color="@color/grey"/>
        </shape>
    </item>

    <item
        android:height="180dp"
        android:gravity="top">
        <shape android:shape="rectangle">
            <solid android:color="?colorPrimary"/>
        </shape>
    </item>
</layer-list>
In this case, the second <item> emulates the Toolbar that is displayed in the actual content, even, we could put the same height (less the width of the status bar) and apply some nice animation on the toolbar to provide a better experience to the user.

private void collapseToolbar() {
    int toolBarHeight;
    TypedValue tv = new TypedValue();
    getTheme().resolveAttribute(android.R.attr.actionBarSize, tv, true);
    toolBarHeight = TypedValue.complexToDimensionPixelSize(
        tv.data, getResources().getDisplayMetrics());

    ValueAnimator valueHeightAnimator = ValueAnimator
        .ofInt(mContentViewHeight, toolBarHeight);

    valueHeightAnimator.addUpdateListener(
        new ValueAnimator.AnimatorUpdateListener() {

        @Override
        public void onAnimationUpdate(ValueAnimator animation) {
            ViewGroup.LayoutParams lp = mToolbar.getLayoutParams();
            lp.height = (Integer) animation.getAnimatedValue();
            mToolbar.setLayoutParams(lp);
        }
    });

    valueHeightAnimator.start();
    valueHeightAnimator.addListener(
        new AnimatorListenerAdapter() {

        @Override
        public void onAnimationEnd(Animator animation) {
            super.onAnimationEnd(animation);

            // Fire recycler animator
            mAdapter.addAll(ModelItem.getFakeItems());

            // Animate fab
            ViewCompat.animate(mFab).setStartDelay(600)
                .setDuration(400).scaleY(1).scaleX(1).start();

        }
    });
}
Resources
- onboarding-examples - Github
- Uber onboarding
- Use cold start time effectively with a branded launch theme - Ian Lake
- Splash Screens Are Evil, Don't Use Them! - Cyril Mottier
- Launch screens - Material Design Spec
- Launch screens - MaterialDoc, Gonzalo Toledano
'android' 카테고리의 다른 글
| 안드로이드 오(O) 프리뷰 관심있는 애들만 살짝 리뷰 (1) | 2017.03.27 |
|---|---|
| 안드로이드 인기 라이브러리 (github) (0) | 2014.07.22 |
| 스미싱 차단 (잡았다 피싱) - (안드로이드, 구글플레이) (2) | 2013.09.16 |
| CGV 예매 열림 알리미 (잡았다 내 자리) - (안드로이드, 구글플레이) (6) | 2013.07.24 |
| Animated gif encoder For Android (안드로이드 GIF 움짤 제작 라이브러리) (3) | 2013.07.11 |
